
It's no secret that I love a good stripe. But making clothing with striped fabric adds the challenge of matching up the lines when you sew the pieces together. So I thought I'd share some tips on how to get your stripes matching up at the seams - this is the process that I go through when making a stripey top or dress using the Coco, Romy or Agnes sewing patterns.
But first, I'd just like to point out the obvious fact that this process is totally optional. Ready-to-wear clothing is sold all the time with unmatched stripes. If the stripes on your dress don't join at the seams, the world isn't going to end. If anyone points out that the stripes on your top are a bit wonky, well, they're probably not the kind of people you want to be hanging out with. If you just wanna get on and sew without taking these additional steps, go for it - life's too short!
Still here? Okay, so on to the tips. My stripe matching strategy begins before I've even cut the fabric...
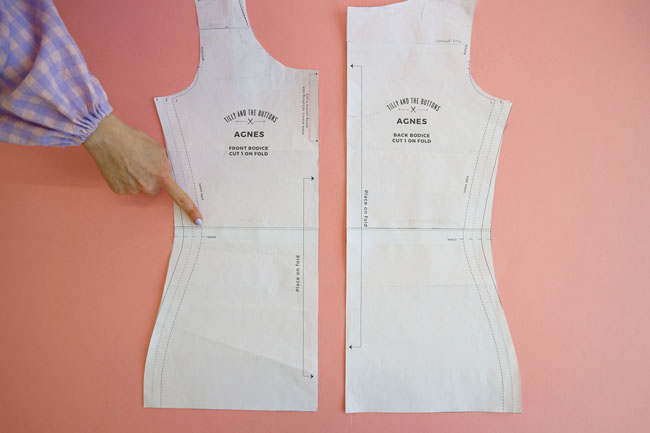
Draw a horizontal line around the centre of the front bodice and back bodice pattern pieces, at right angles to the grainline arrow or centre front/back line. The pattern I’m using has a lengthen/shorten line in the middle of the pattern, so I’m going to use this.
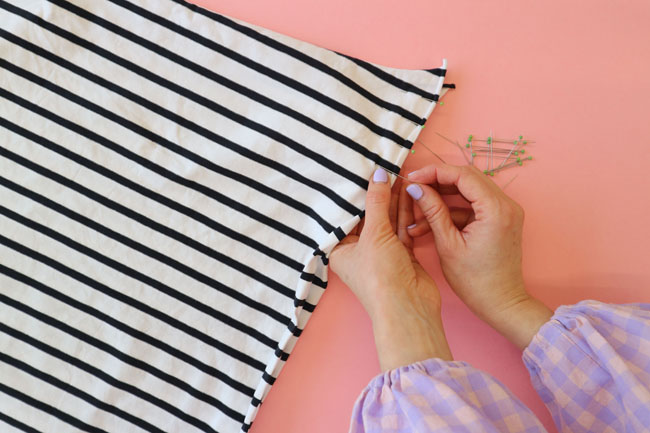
If the fabric is on the thicker side and doesn’t slide around so much, you can fold the fabric in half to cut the bodice pieces on the fold. Make sure the stripes on the top layer are exactly on top of the stripes on the bottom layer by pinning them together at the edges.
First, check it’s the two ends of the same stripe that you’re pinning together. Then insert a pin along the top edge of one stripe, turn the fabric over and check that, on the bottom layer of fabric, the pin is positioned along the top edge of the same stripe. If it's not, reposition it. If stripes are about 2 - 3cm or 1in apart, I usually pin every stripe; if they’re narrower, I go with every few stripes.
On single knit jerseys and other fabrics that are prone to moving around on your cutting table, it’s more accurate to cut with the fabric laid out flat, on a single layer.

Place the front bodice on the fabric, and line up a top or bottom corner with either the top or bottom of a stripe. Pivot the pattern piece so the horizontal line you added to the pattern (or the lengthen/shorten line) is exactly parallel to the stripes, making sure that it’s the same stripe on either side. Keep the pattern in place with pins or pattern weights.
If you’re cutting on a folded double layer of fabric, line up the edge marked ‘place on fold’ with the fold line as you usually would, and cut away.

If you’re cutting on a single layer of fabric, cut one side of the pattern, remembering not to cut the centre front edge marked ‘place on fold’. Mark the centre front line on the fabric by inserting pins exactly along it (alternatively you could mark it with chalk pencil or washable pen, but I find pins quicker and more helpful).
Remove the pattern piece, then flip the cut piece over along this centre line, checking the pins are exactly along the fold. Smooth it out, line up the stripes with the stripes on the fabric below, and secure in place with pins.
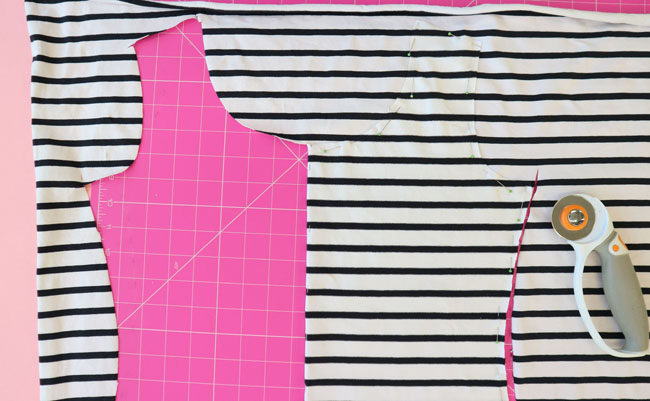
Now you can use the first half that you cut as a template for cutting the second half, so you can ensure that the stripes are parallel all the way across.
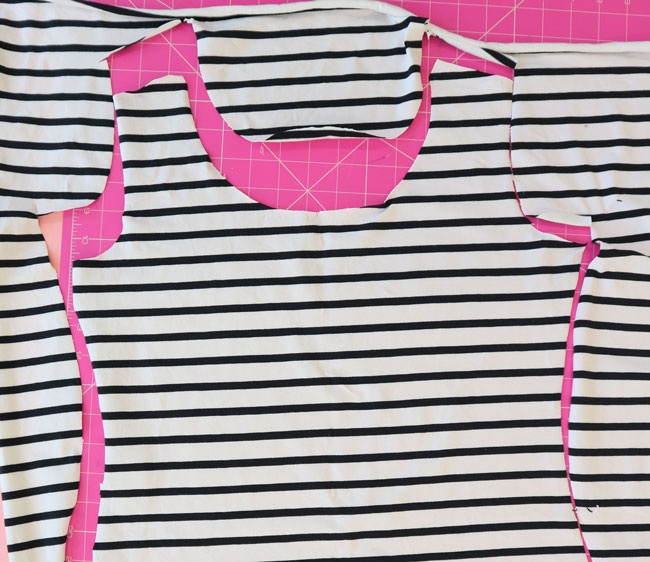
So that’s the front bodice – let’s move on to the back bodice, and I’ll show you how to ensure the stripes match up at the side seams.

Lay the back bodice on the fabric, lining up the top or bottom corner so it’s in the same position in relation to the stripes as you cut the front bodice. For example, if you lined up the bottom corner with the bottom of a stripe, do the same on the back bodice. Pivot the pattern piece so the horizontal line you drew (or lengthen/shorten line) is parallel to the stripes.
Secure in place with pins or weights, and cut the back bodice the same way you cut the front bodice.
So that’s how you cut out a bodice so the front and back match up at the side seams. Below I show you how to sew them together, but first let’s talk sleeves.

Due to their curved shape, it’s almost impossible to get all of the stripes on a sleeve head to match the stripes on an armhole. So I wouldn’t even bother trying. But what you can do, if you are feeling fancy, is try to align the most prominent stripe – around half way down the front armhole, where the armhole notch is.

On the front bodice piece you cut out, measure in 15mm (5/8in) from the armhole notch, at a right angle to the raw edge – this is where the stitching line will be. Make a note of where this point falls in relation to a stripe – i.e. the top, bottom or middle of a stripe, or in between stripes.
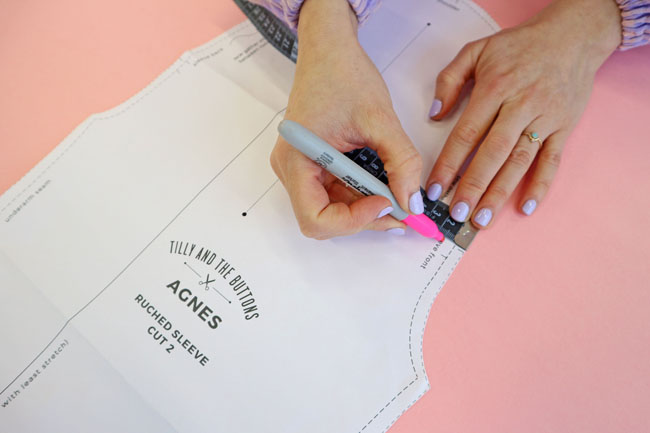
On the sleeve pattern, measure 15mm (5/8in) from the front armhole notch, again at a right angle to the edge, and mark this point with a dot in pen or pencil.
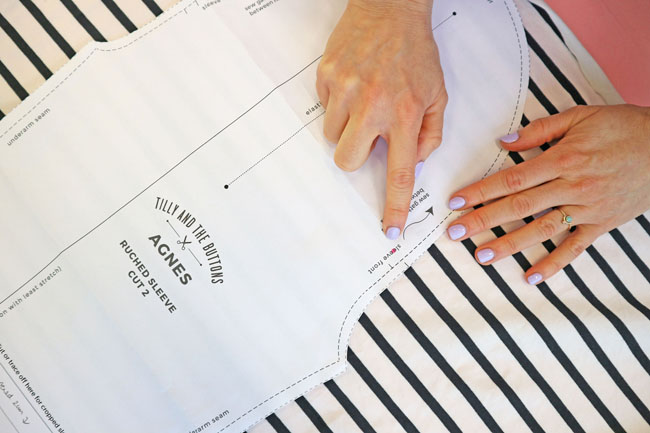
Place the sleeve pattern on your fabric – again, you can fold the fabric in two if it’s easy to keep the stripes aligned, or cut on a single layer if your fabric is moving around, as lots of jerseys do. Line up the dot you just marked so it’s at the same position in relation to a stripe as the point on the front bodice armhole fabric piece (top, middle, bottom, in between…).
Pivot the pattern piece to get the lengthen/shorten line parallel to the same stripe, as you did with the bodice, making sure the dot you drew stays in the same place. As knit fabrics have a tendency to get twisted, I also like to double check that the top corners of the underarm seams are exactly parallel to the same stripe so the stripes match up at the underarm seam, and the same with the sleeve hem.
Secure the sleeve pattern in place with pins or weights and cut away. If you cut on a single layer of fabric, flip the sleeve pattern face down to cut the second piece symmetrically – or flip the fabric face down instead.

So your pieces of fabric are cut out and ready to sew. When you come to pinning the bodice side seams or sleeve underarm seams, insert the pins along the top or bottom of each stripe (or every other stripe, or every few stripes, depending on how far apart they are) – use lots of pins! Check the pins are coming out in the same position in relation to the stripe on the underside. Also check that the pins are crossing the stitching line, ie. 15mm (5/8in) within the raw edges.
Whether you're planning to sew the garment together on a regular sewing machine or an overlocker (serger), it's a good idea to tack (baste) first on the areas where you want the stripes to match – so the bodice side seams, sleeve underarm seams, and just across the stripe you’re aiming to match on the sleeve armhole. Set the stitch length to 4-5mm. If you've got a walking foot or dual feed foot for your sewing machine, attach that as it will help feed the layers of fabric through the machine evenly without one of them shifting along a bit faster than the other (some machines have this built in). Tack just within the seam allowance - ie. about 12mm (1/2in) from the raw edges.

Open out the layers and check the stripes are matching on the right side. If any of them aren’t aligned as neatly as you’d like, you can unpick that bit and try again (although I’m not judging!).
Once you're happy with the tacking, rethread your machine and reset the stitch length - or get out your overlocker - and sew the seams for real. Now you can pull out any remaining or visible tacking stitches.


You should now have beautifully matching stripes!
If you like this post, you may also like Troubleshooting Overlocker Stitches
[This post was originally written in April 2014, and updated in March 2023]
*****
Author: Tilly Walnes
Photos and video: Abi Dyson
